
Escape From Duckov Multiplayer Guide
Want to team up with a friend in the world of Duckov? This comprehensive guide will walk you through setting up multiplayer using a virtual LAN, allowing you and your partner to explore this dangerous yet exciting duck world together.
Important Notice: The current multiplayer MOD supports only 2 players
Step 1: Subscribe to Multiplayer MOD
Visit the Steam Workshop to subscribe to the multiplayer MOD: Escape From Duckov Co-op MOD

Instructions:
- Click the "Subscribe" button on the right side of the page
- Click "Subscribe to All" in the collection popup
- Wait for Steam to automatically download the MOD (you can check progress in Steam's download manager)
Tip: Both players need to subscribe and download the same MODs
Step 2: Configure Virtual LAN
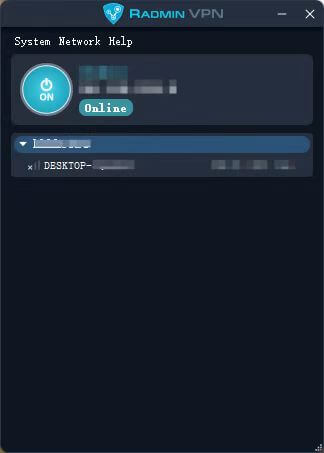
Download and Install Radmin VPN
Both players need to download and install Radmin VPN. This is a free virtual LAN tool that allows players not on the same local network to play together.
Host Player Creates Network
- Open Radmin VPN software
- Click "Create Network"
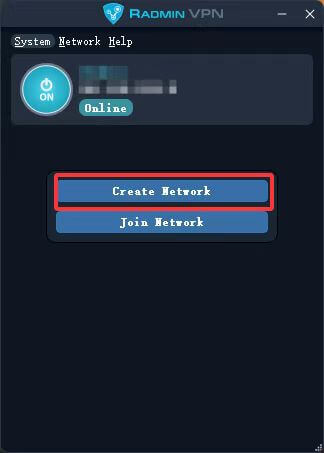
- Enter network name and password
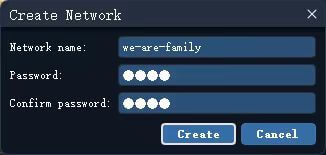
Suggestion: Set an easy-to-remember network name and password for the client player to join
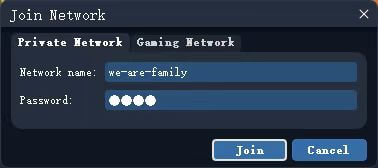
Client Player Joins Network
- Open Radmin VPN software
- Click "Join Network"
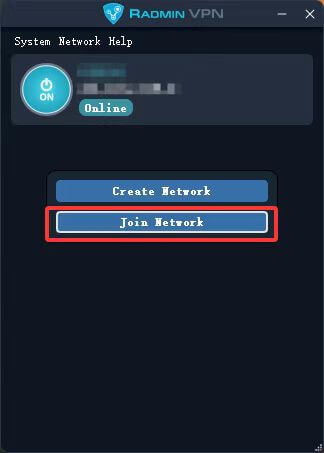
- Enter the network name and password provided by the host player
- After successfully joining, the host player can see the client connected in the list
Step 3: In-Game Configuration
Enable MODs
- Launch Escape From Duckov
- Click "MOD" in the main menu to enter the MOD management interface
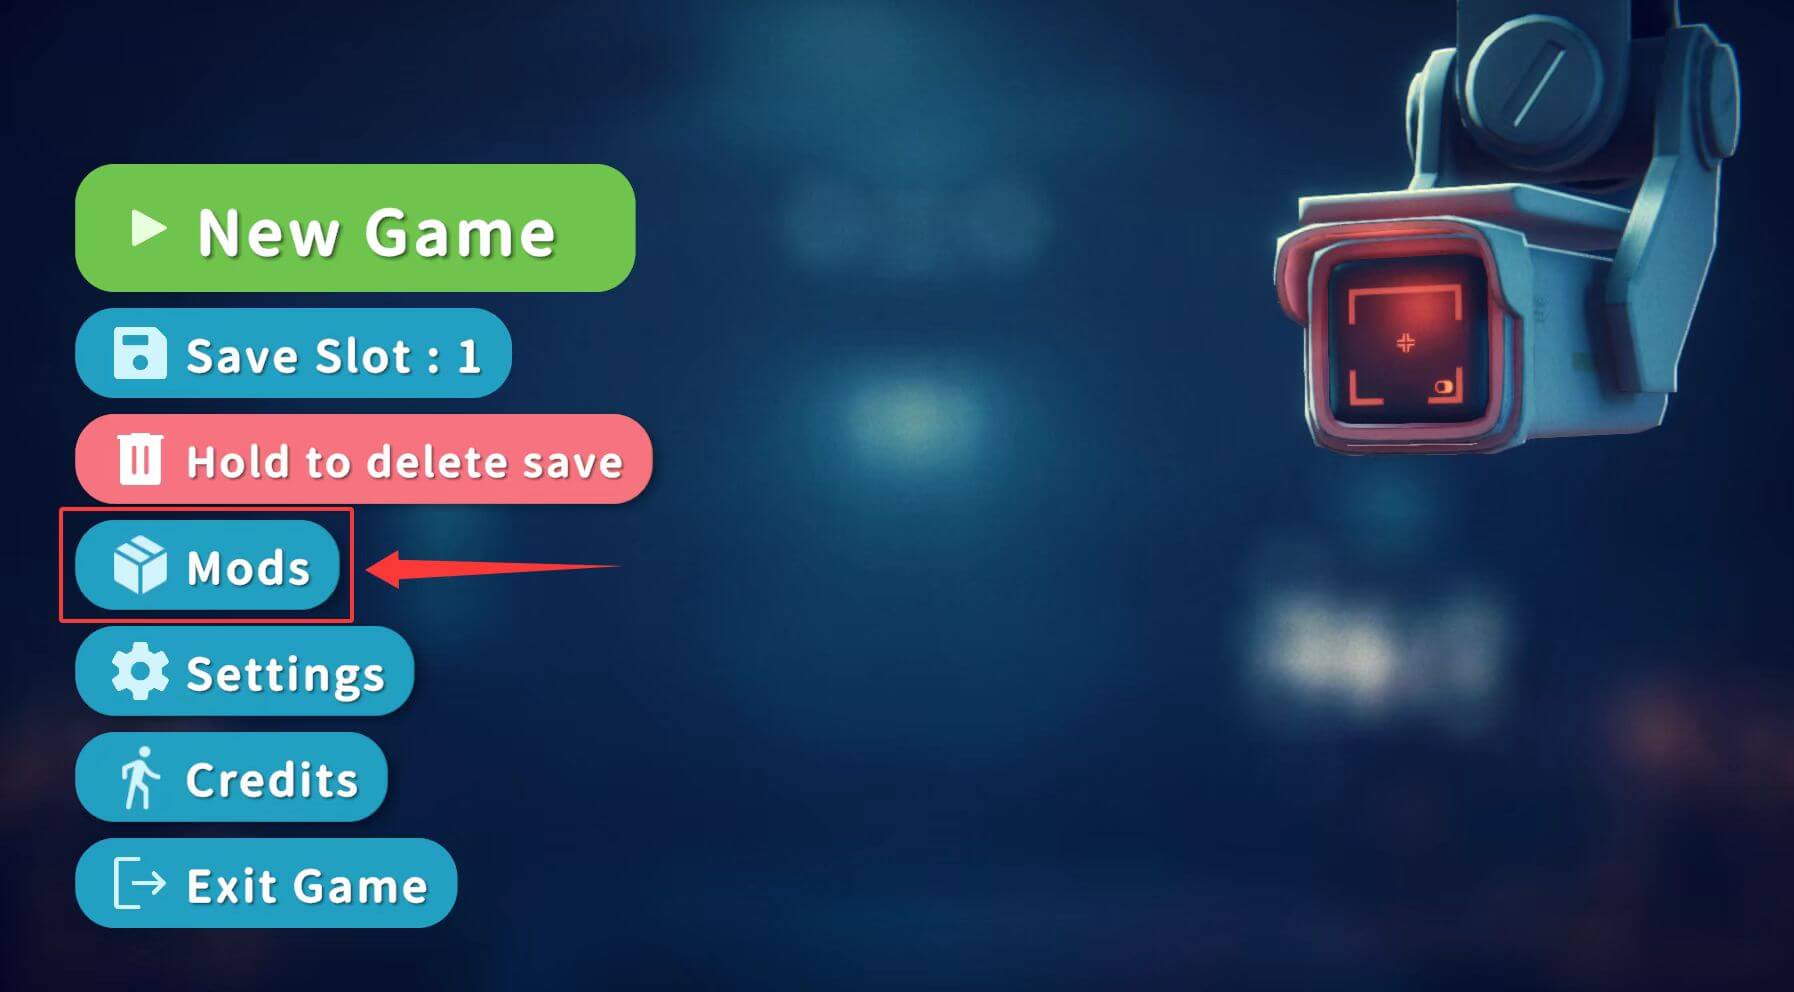
- Check the multiplayer-related MODs, note that the multiplayer MOD must be placed at the bottom of the list

- If you enable the console MOD, a console window will pop up - just minimize it
Restart Game and Connect
- Restart the game as prompted
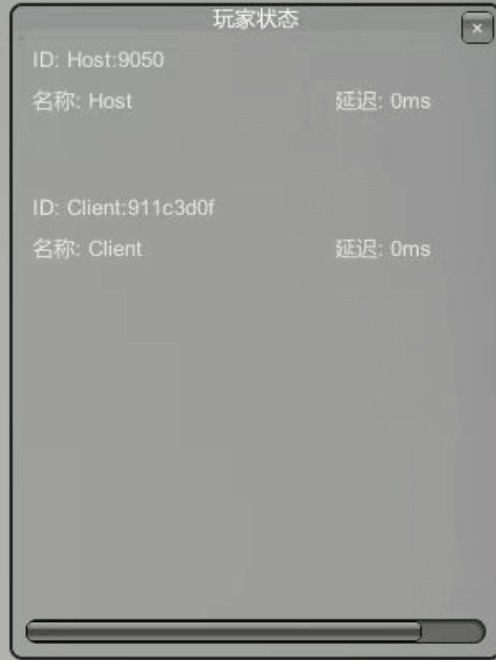
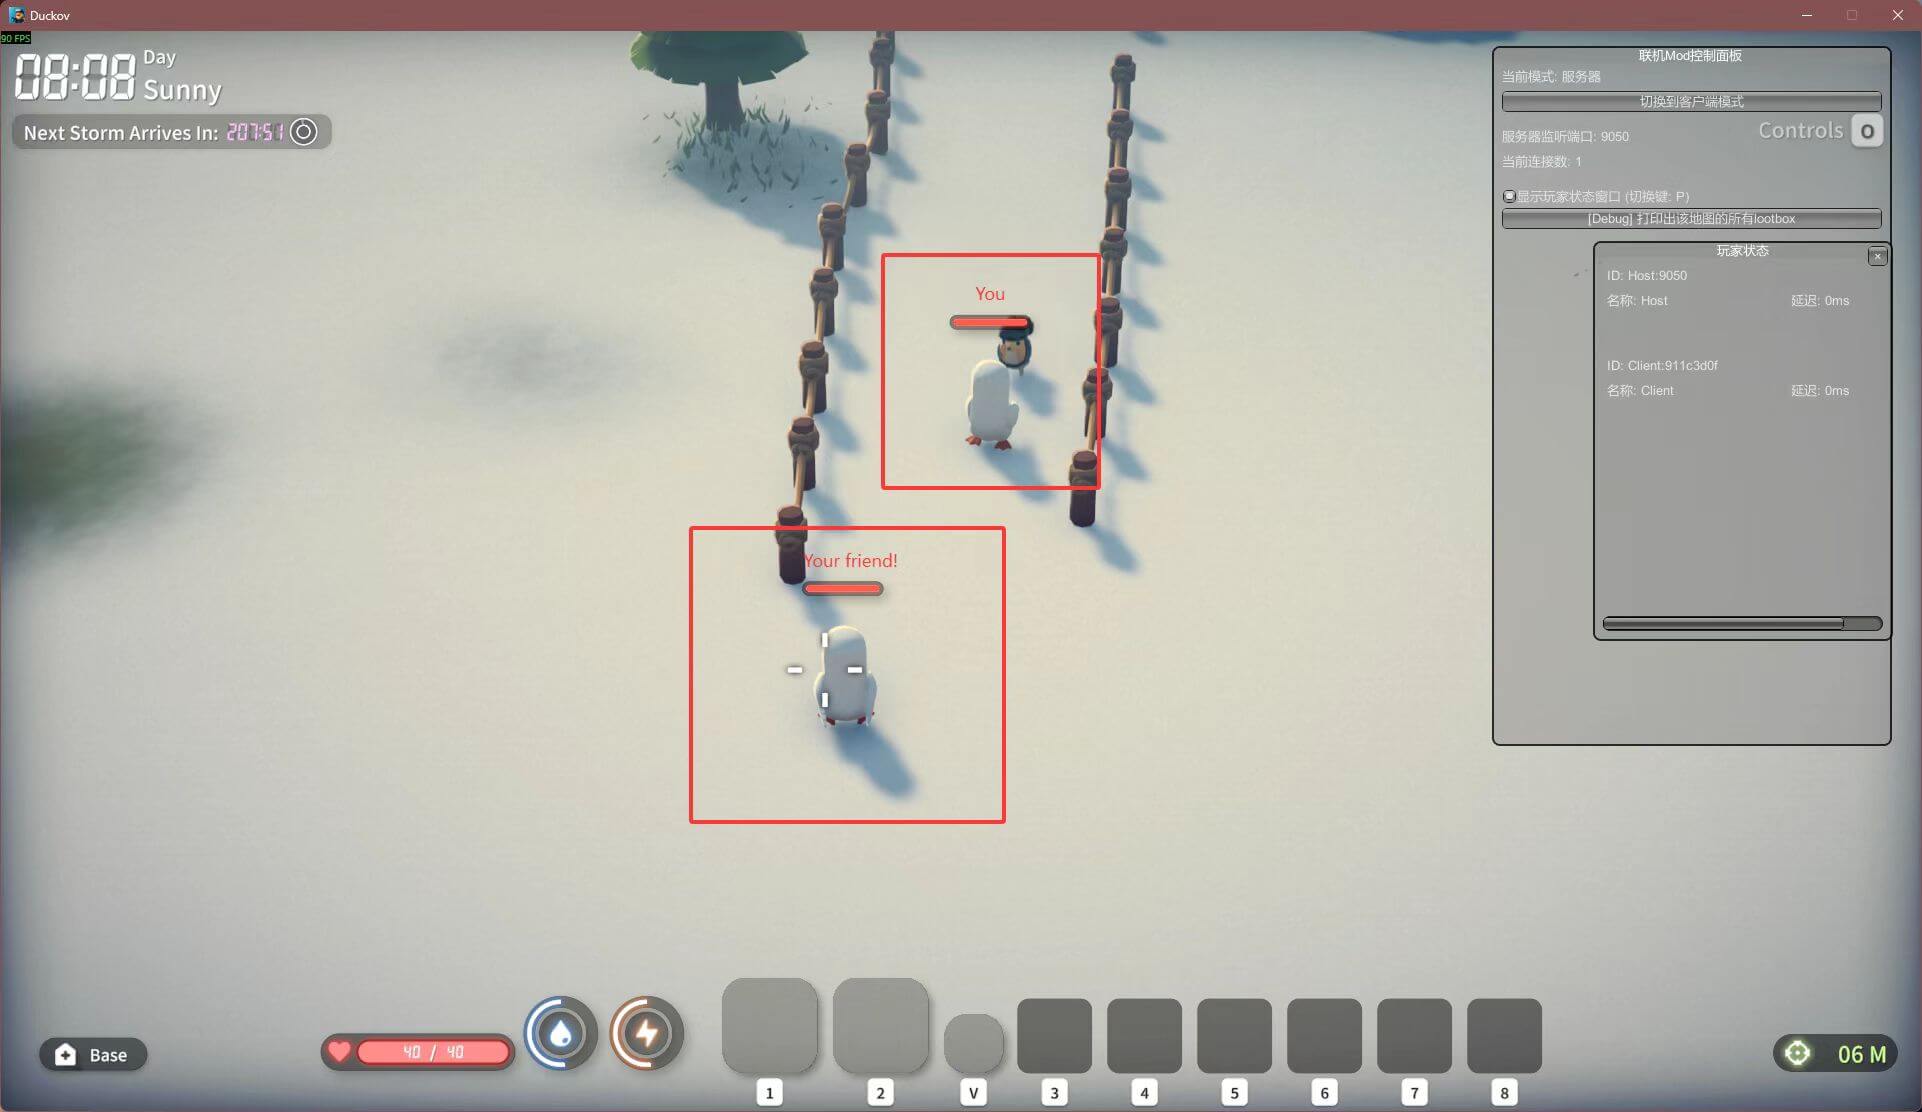
- After restarting, you'll see a multiplayer overlay on the left side of the game

-
Host Player: Click "Switch to Server Mode", and the mode will change to server
-
Client Player:
- Check the host player's IP address in Radmin VPN
- Enter that IP address in the game overlay's IP input field
- Click "Manual Connect"

- After successful connection, the overlay will show the connection status
Step 4: Start Playing
- Host Player creates or loads a save file
- Both players press the J key simultaneously to indicate ready
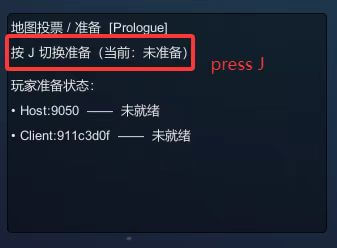
- After both players are ready, you can officially enter the game and start your co-op adventure!
Important Notes
⚠️ Critical:
- Both players' MOD lists and order must be exactly the same
- MOD versions must also be consistent
- Keep Radmin VPN connected during multiplayer sessions
- If you encounter connection issues, check if firewall settings are blocking the game or Radmin VPN
Frequently Asked Questions
Q: What if I can't connect?
A: Check the following:
- Is Radmin VPN properly connected?
- Are both players' MOD lists exactly the same?
- Do firewalls allow the game and Radmin VPN to communicate?
- Try restarting both the game and Radmin VPN
Q: Can more than 2 players play together?
A: Currently, the multiplayer MOD only supports 2 players
Q: How is save data synchronized?
A: Saves are managed by the host player; client player progress is not saved separately
About This MOD
Escape From Duckov Co-op Mod | 2025.10.28 | Fully Open Source
This MOD is fully open-sourced on Github. Contributions, issue reports, and improvement suggestions are welcome.
Github Repository: https://github.com/Mr-sans-and-InitLoader-s-team/Escape-From-Duckov-Coop-Mod-Preview